
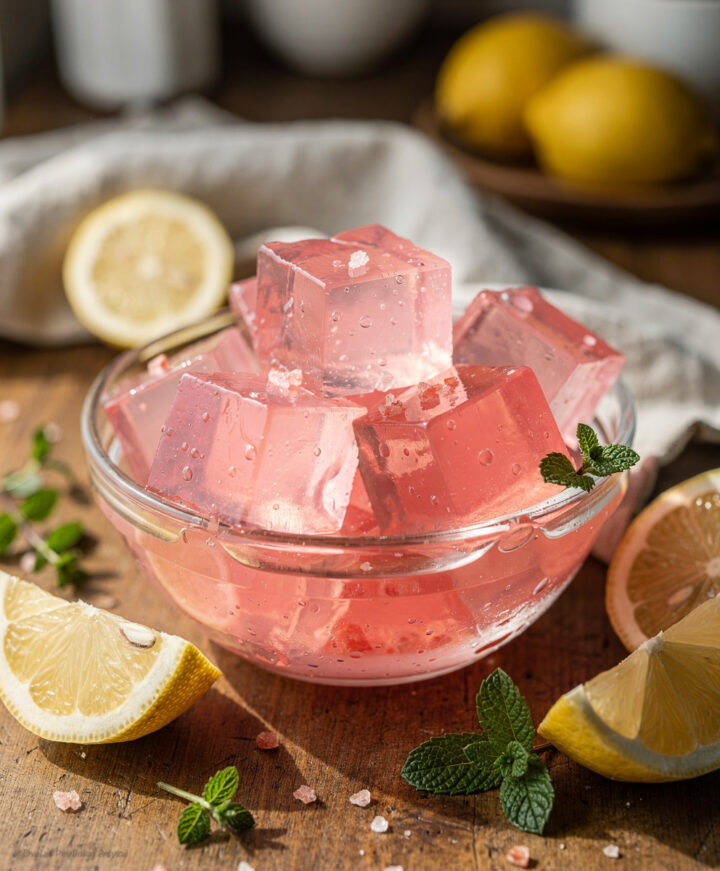
I learned the hard way that plain water won't cut it after a brutal summer run. This electrolyte gelatin recipe saved my recovery and tastes like a bright, tangy treat.
It happened on a July afternoon in Queens, the kind of day where the sidewalk shimmers and your shoes feel like they're melting into the pavement. I stumbled back into my kitchen, chugged two full glasses of water, and still felt hollow. Foggy. That dragging, nothing-helps kind of dehydrated. My body didn't need more water. It needed minerals.
That afternoon, I made my first batch of homemade electrolyte jello. It was rough. No ratios, no science, just guessing. But the concept worked immediately, and I've been refining it ever since.
Here's what nobody online tells you: most electrolyte gelatin recipes list the ingredients without ever telling you how many milligrams of sodium, potassium, or magnesium you're actually consuming per serving. That's the detail that separates a decoration from a function. I spent time cross-referencing ingredient data and sports nutrition guidelines so you don't have to. If you are looking for a drinkable version of this same concept, check out the Himalayan Salt Gelatin Drink for another way to get your minerals.
As someone who trained professionally in culinary arts and has spent years researching food as functional medicine at Salt Clarity, I'm going to walk you through everything: the base recipe, a real per-serving mineral table, gelatin type comparisons, four targeted use-case variations, troubleshooting, and the pink salt method that ties it all together.
Jump to:
- electrolyte gelatin recipe
- What Does This Electrolyte Gelatin Recipe Actually Do for Your Body
- The Problem with Store-Bought Jello and Sports Drinks
- The Master Electrolyte Gelatin Recipe (Base Formula)
- Choosing the Right Gelatin: A Buyer's Guide Most Recipes Skip
- Four Targeted Variations for Specific Needs
- Troubleshooting Common Problems
- The Pink Salt Method: Why It Completes the Recipe
- Storage and Shelf Life
- Final Thoughts
- FAQs about electrolyte gelatin recipe
electrolyte gelatin recipe
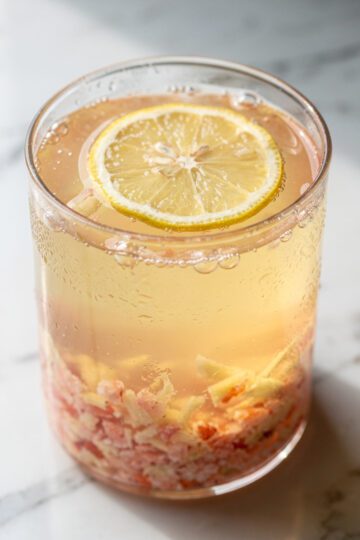
This homemade electrolyte gelatin provides sustained hydration with a bright tangy flavor. It uses coconut water, citrus, and pink salt for a functional recovery treat that tastes great.
- Total Time4h 15min
- Yield8 servings 1x
- DietGluten Free, Dairy Free
Ingredients
- 2 ½ cups coconut water, not from concentrate
- ½ cup fresh lemon or lime juice
- 2 tablespoons unflavored grass-fed gelatin powder (approximately 14g)
- ¼ teaspoon pink Himalayan salt
- 1 to 2 tablespoons raw honey or pure maple syrup, adjusted to taste
- ¼ teaspoon magnesium glycinate powder (optional but recommended)
Instructions
- Pour ½ cup of cold coconut water into a medium bowl. Sprinkle the gelatin evenly across the surface. Do not stir. Let it bloom for exactly 5 minutes.
- Heat the remaining 2 cups of coconut water in a small saucepan over medium-low heat until it reaches approximately 160 degrees F (71 degrees C). Do not let it boil.
- Pour the hot coconut water over the bloomed gelatin. Whisk gently for 60 to 90 seconds until fully dissolved, no visible granules.
- Add the lemon juice, Himalayan salt, magnesium powder if using, and your sweetener. Stir to combine.
- Pour into your 8x8 glass dish or individual silicone molds.
- Refrigerate for a minimum of 4 hours. Do not freeze to speed the process.
Notes
Skipping the bloom causes clumping and a gritty texture. Boiling the coconut water breaks down gelling proteins. Use grass-fed beef gelatin for best results. Store in refrigerator for up to 5 days.
- Prep Time: 10min
- Cook Time: 5min
- Category: snack
- Method: no-bake
- Cuisine: American
Nutrition
- Serving Size: 8
- Calories: 35
- Sugar: 5
- Sodium: 135
- Fat: 0
- Saturated Fat: 0
- Unsaturated Fat: 0
- Trans Fat: 0
- Carbohydrates: 6
- Fiber: 0
- Protein: 3
- Cholesterol: 0
What Does This Electrolyte Gelatin Recipe Actually Do for Your Body
Let's get clear on the science first, because once you understand it, every recipe decision makes instant sense.
Electrolytes, sodium, potassium, magnesium, and chloride are electrically charged minerals. They're not optional extras. They regulate how fluid moves in and out of your cells, how your nerves fire signals, and how your muscles contract and release. When you sweat, vomit, or simply don't eat enough mineral-rich food, these levels drop. And when they drop, water alone cannot rehydrate you efficiently. Your body needs minerals present to pull that water into cells, that's basic osmotic physiology.
So where does gelatin come in? Gelatin forms what scientists call a hydrogel matrix. Think of it as a three-dimensional protein net holding liquid in suspension. When you eat electrolyte gelatin, your body absorbs those minerals more gradually than if you'd sipped the same ingredients as a drink. The result is sustained hydration over hours, not a quick spike followed by a bathroom run.
There's another layer here that I love: glycine. It's the dominant amino acid in gelatin, and it actively supports the integrity of your gut lining. For anyone recovering from illness, when the intestinal wall is irritated and absorption is already compromised, that matters more than most people realize. My Himalayan Salt Gelatin Drink covers this glycine angle in detail if you want to go deeper.
The Problem with Store-Bought Jello and Sports Drinks
Here's the uncomfortable truth. Standard commercial Jello contains Red 40, Blue 1, high-fructose corn syrup, and sodium in quantities so small they offer zero therapeutic benefit. We're talking decorative sodium, not functional sodium.
Popular sports drinks are only marginally better. Yes, they contain electrolytes, but in synthetic, lower-bioavailability forms, and packaged with 34 grams of sugar per bottle. That sugar load triggers an insulin response that can actually work against the calm, steady rehydration you're trying to achieve.
Homemade electrolyte gelatin made with real coconut water, fresh citrus, and pink Himalayan salt is not a wellness trend. It's just the smarter version of something your body already knows how to use.
The Master Electrolyte Gelatin Recipe (Base Formula)
This is your foundation. Every variation in this article builds from here.
Each ingredient earns its place. Coconut water is your potassium powerhouse, it naturally contains around 470mg of potassium per cup, which is why it's the preferred liquid base for any coconut water gelatin recipe focused on hydration. Fresh lemon juice adds vitamin C (which aids iron absorption and immune function), brightens the flavor, and provides a tiny natural acid that balances the mineral taste. Grass-fed gelatin delivers the hydrogel structure plus collagen-supporting amino acids. Pink Himalayan salt is your sodium and trace mineral source. Magnesium glycinate powder is optional but genuinely changes the mineral profile from good to complete. For the drinkable version of this same mineral combination, the Pink Himalayan Salt Electrolyte Drink covers the full base formula in liquid form.
Ingredient List (Serves 6 to 8, poured into an 8x8 pan):
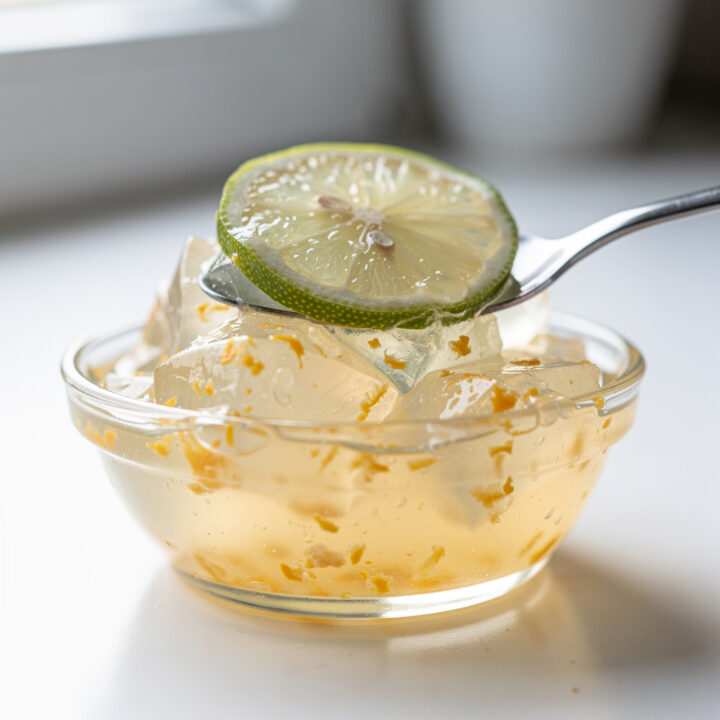
- 2 ½ cups coconut water, not from concentrate
- ½ cup fresh lemon or lime juice
- 2 tablespoons unflavored grass-fed gelatin powder (approximately 14g)
- ¼ teaspoon pink Himalayan salt
- 1 to 2 tablespoons raw honey or pure maple syrup, adjusted to taste
- ¼ teaspoon magnesium glycinate powder (optional but recommended)
Estimated Electrolytes Per Serving (based on 8 servings):
| Mineral | Amount Per Serving | Daily Value Approx. |
|---|---|---|
| Sodium | ~135mg | ~6% |
| Potassium | ~250mg | ~5% |
| Magnesium | ~25mg | ~6% |
| Chloride | ~80mg | ~3% |
Values are estimates based on standard ingredient amounts. Run your specific brands through a nutrition calculator for precise figures.
Step-by-Step Method With Critical Temperature Notes
Pour ½ cup of cold coconut water into a medium bowl. Sprinkle the gelatin evenly across the surface. Do not stir. Let it bloom for exactly 5 minutes. Skipping the bloom causes clumping and a gritty, uneven texture, non-negotiable step.
Heat the remaining 2 cups of coconut water in a small saucepan over medium-low heat until it reaches approximately 160 degrees F (71 degrees C). Do not let it boil. Boiling breaks down the gelling proteins and weakens the final set.
Pour the hot coconut water over the bloomed gelatin. Whisk gently for 60 to 90 seconds until fully dissolved, no visible granules.
Add the lemon juice, Himalayan salt, magnesium powder if using, and your sweetener. Stir to combine.
Pour into your 8x8 glass dish or individual silicone molds.
Refrigerate for a minimum of 4 hours. Do not freeze to speed the process freezing ruptures the gel structure and you'll end up with a weeping, grainy mess.
If you enjoy weight-loss focused gelatin recipes, my Overnight Gelatin Trick for Weight Loss uses a similar base with overnight timing for maximum satiety.
Choosing the Right Gelatin: A Buyer's Guide Most Recipes Skip
Not all gelatin performs equally. Gelling strength, protein quality, and dietary suitability vary significantly across types. Buying the wrong one doesn't just affect texture, it can affect who can eat it.
Here's every category you'll encounter:
Gelatin Types Compared Side by Side
| Type | Source | Gelling Strength | Best For | Notes |
|---|---|---|---|---|
| Beef gelatin | Bovine hide | High (225 to 250 bloom) | Firm gummies, sliceable gel | Most common; needs halal/kosher certification |
| Pork gelatin | Porcine skin | High (200 to 230 bloom) | Smooth classic texture | Not halal or kosher |
| Fish gelatin | Fish scales | Medium (150 to 200 bloom) | Softer, fluid texture | Halal and pescatarian-friendly |
| Agar-agar | Red algae | Very high, sets firmer | Vegan version | Sets at room temp, different mouthfeel |
| Collagen peptides | Bovine or marine | None, will not gel | Nutritional add-in only | Never substitute for gelatin |
Grass-fed or pasture-raised beef gelatin is the preferred choice for this electrolyte gelatin recipe, not because of marketing. For another popular gelatin-based recipe that supports weight management goals, take a look at the Pink Salt Gelatin Trick for Weight Loss.
Why Grass-Fed Matters
Grass-fed beef gelatin comes from animals raised on pasture rather than feedlots. This matters for two practical reasons: higher glycine content and lower risk of antibiotic residue. Glycine is the amino acid that supports sleep quality, detoxification pathways, and collagen synthesis. When you're making a functional food, the quality of your protein source directly affects the outcome.
If you're vegetarian or vegan, agar-agar is your option. But understand the trade-off: agar sets firmer and at room temperature, but it lacks the glycine and the hydrogel absorption dynamics. It's a different product entirely.
Four Targeted Variations for Specific Needs
One base recipe, four specific outcomes. Each variation below adjusts the ingredient ratios or additions for a different goal.
Variation 1: Post-Workout Recovery (Higher Sodium)
Adjust the pink salt to ½ teaspoon. Add 1 tablespoon of fresh lime juice in addition to the lemon. This brings sodium per serving to approximately 270mg, which is ideal after heavy sweating. The extra citrus also provides a small potassium boost. This version is designed for immediate post-exercise consumption.
Variation 2: Morning Hydration (Lower Sugar)
Reduce the sweetener to 1 teaspoon of raw honey or omit it entirely. The coconut water and citrus provide enough natural sweetness for most palates. Add ¼ teaspoon of ginger powder for its anti-inflammatory properties. This version works well for anyone managing blood sugar or starting a low-sugar day.
Variation 3: Gut-Healing Support (Extra Glycine)
Use 3 tablespoons of grass-fed gelatin instead of 2. Add 1 tablespoon of fresh aloe vera juice (food-grade only). Reduce the citrus to ¼ cup to lower acidity. The higher gelatin content increases the glycine dose, which supports intestinal repair. This version is thicker and requires 5 hours minimum set time.
Variation 4: Keto-Friendly Version
Replace the honey or maple syrup with 10 drops of liquid stevia or monk fruit sweetener. Use full-fat coconut milk for ½ cup of the coconut water to add healthy fats. The fat content slows digestion further, extending the sustained hydration window. Magnesium is non-negotiable in this version to support electrolyte balance on a low-carb diet.
For a fiber-forward version of the same gelatin protocol, the Chia Gelatin Weight Loss Recipe adds chia's mucilage gel to the satiety mechanism for a dual-action pre-meal snack.
Troubleshooting Common Problems
Even with exact ratios, things can go wrong. Here's what to do when they do.
Problem: Gelatin Didn't Set
Most common cause: the liquid was too hot when added to the gelatin. If the coconut water exceeded 180 degrees F, the gelling proteins denatured and lost their ability to form a network. Solution: always use a thermometer and never let the liquid approach boiling.
Second cause: old gelatin. Gelatin loses potency over time. Check your package expiration date. If yours is more than six months past date, buy fresh.
Problem: Grainy or Rubbery Texture
Grainy texture comes from unbloomed gelatin. You must let it sit in cold liquid for a full 5 minutes before adding heat. Rubbery texture comes from too much gelatin relative to liquid. Stick to the 2 tablespoon per 3 cups ratio.
Problem: Separation or Weeping
Weeping, where liquid pools on top of the set gelatin, happens when the gel structure breaks down. This occurs if you froze it, if you added fresh pineapple or kiwi (which contain proteolytic enzymes that break down gelatin), or if you didn't refrigerate it long enough. Always test a small spoonful after 4 hours. If it holds its shape, it's ready.
The Pink Salt Method: Why It Completes the Recipe
Pink Himalayan salt is not a gimmick in this recipe. It contains 84 trace minerals beyond just sodium chloride, including calcium, potassium, and magnesium in small but measurable amounts. When you dissolve it in the warm coconut water, those trace minerals integrate into the gel matrix alongside the primary electrolytes.
The practical effect is a more complete mineral profile than table salt can offer. Table salt is 97.5% sodium chloride with anti-caking agents. Pink salt is roughly 85% sodium chloride with the remaining fraction being trace minerals. For a hydration recipe, that difference matters.
Use fine-grain pink salt for even dissolution. Coarse grain may not fully dissolve in the warm liquid, leaving you with occasional salt crystals in the finished gelatin.
If you want to understand the full glycine and GLP-1 pathway behind this approach, the gelatin for weight loss complete guide is the essential read.
Storage and Shelf Life
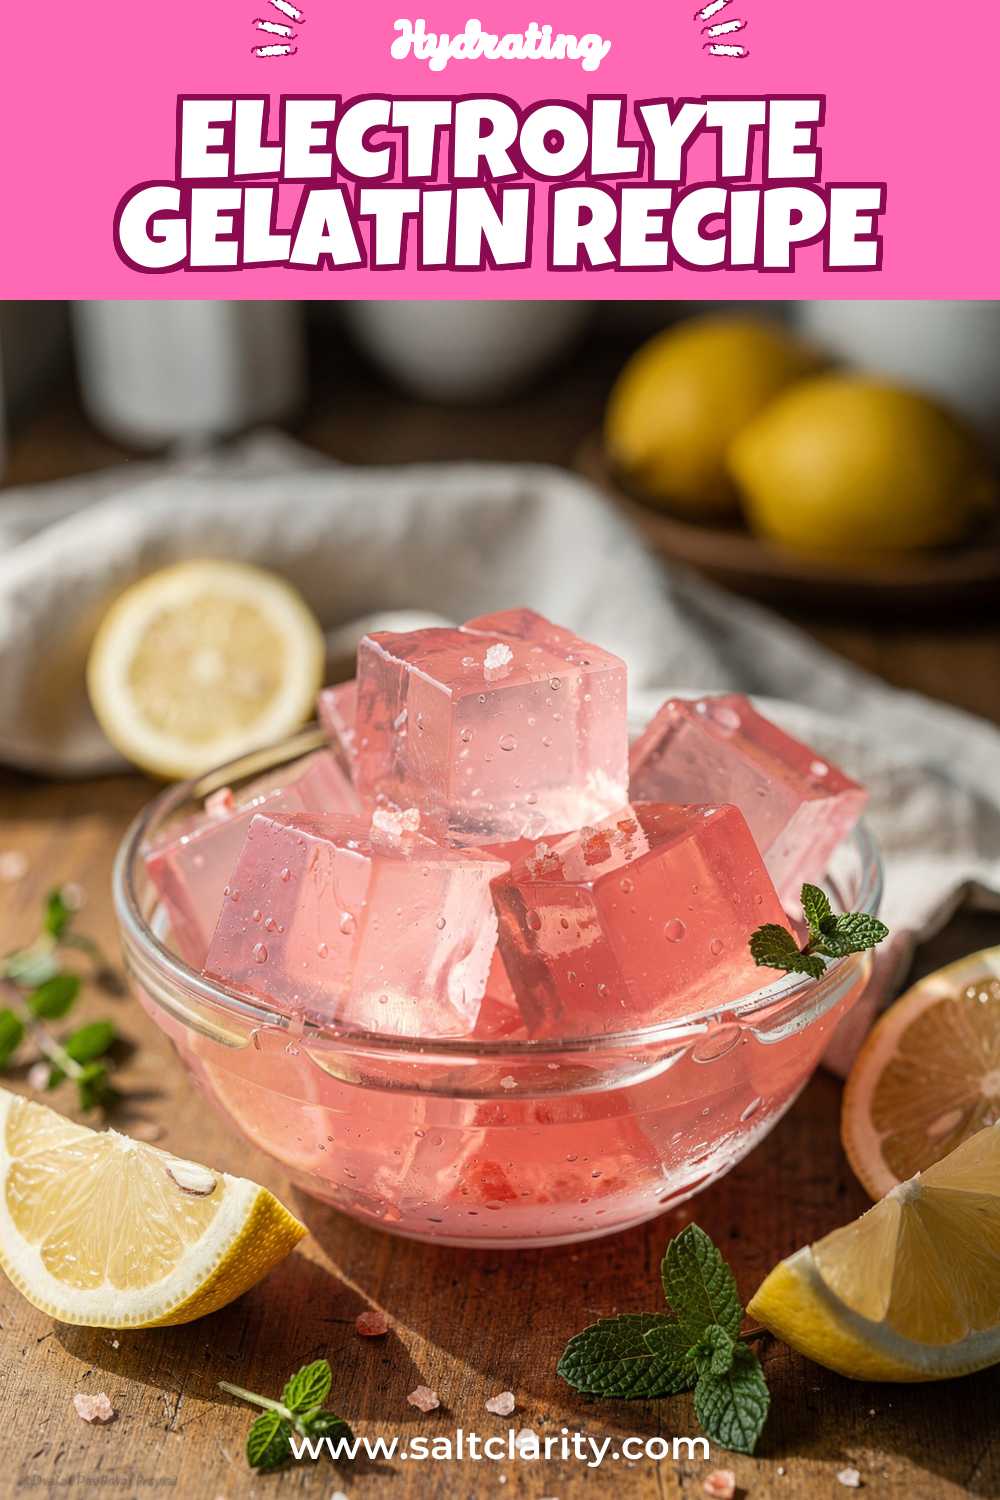
Store your electrolyte gelatin in an airtight container in the refrigerator for up to 7 days. Do not leave it at room temperature for more than 2 hours, as the coconut water base can ferment.
You can cut the set gelatin into cubes and store them in a sealed glass container. This makes for easy grab-and-go portions. Do not freeze for long-term storage, thawing destroys the gel structure.
If you're meal-prepping for the week, make a double batch on Sunday. It holds well and the electrolyte content remains stable throughout the week.
Final Thoughts
This electrolyte gelatin recipe is the result of trial, error, and a lot of kitchen science. It started as a desperate attempt to fix a deficiency I didn't fully understand, and it became a staple I make every week.
The ratios are exact. The science is clear. And the result is a functional food that actually delivers what store-bought alternatives only promise. Whether you're recovering from a run, managing a illness, or just trying to drink smarter, this gelatin gives your body what it's asking for.
If you want to explore another popular variation, the Dr. Oz Pink Gelatin Recipe is a great place to start for a slightly different approach to the same functional concept. And if you're using gelatin as part of a broader wellness protocol, the Natural Mounjaro Alternatives guide ties the full approach together. For those interested in how gelatin can support GLP-1 therapies, the GLP-1 Gelatin Recipe offers a targeted option. And the Jillian Michaels Gelatin Recipe provides another celebrity-endorsed path for those exploring health and weight loss benefits.
Make a batch tonight. Your body will thank you tomorrow.
FAQs about electrolyte gelatin recipe
A basic electrolyte gelatin recipe typically includes unflavored gelatin, coconut water or filtered water, a pinch of sea salt or Himalayan pink salt, and a small amount of honey or maple syrup for natural sweetness. Some recipes also add a squeeze of fresh lemon or lime juice to boost potassium and vitamin C content. These simple ingredients work together to replenish key electrolytes like sodium, potassium, and magnesium.
Yes, electrolyte gelatin is an effective hydration aid because it combines the water-binding properties of gelatin with key minerals like sodium, potassium, and magnesium. It is particularly beneficial during illness, post-workout recovery, or hot weather when the body loses fluids rapidly. The slow-digesting nature of gelatin also helps the body absorb fluids and electrolytes more steadily compared to plain water.
Absolutely, you can make a sugar-free electrolyte gelatin recipe by omitting honey or maple syrup and using unsweetened coconut water or plain water as the base. Natural flavor enhancers like fresh citrus juice or a small amount of fruit puree can add taste without refined sugar. For those following low-carb or keto diets, a few drops of liquid stevia or monk fruit sweetener are excellent sugar-free alternatives.
To make electrolyte gelatin for sick kids, dissolve one packet of unflavored gelatin in two cups of warm coconut water, then add a pinch of sea salt and a tablespoon of honey to restore lost sodium and energy. Pour the mixture into a shallow dish or fun molds and refrigerate for at least two hours until set. This gentle, easy-to-digest option is a nourishing alternative to commercial sports drinks for children recovering from vomiting or diarrhea.
Grass-fed, unflavored gelatin powder is widely considered the best choice for an electrolyte gelatin recipe because it is minimally processed and free from artificial additives. Brands sourced from pasture-raised animals tend to have a higher collagen content, which offers additional gut-healing and joint-supporting benefits. Avoid flavored gelatin mixes like Jell-O, as they typically contain artificial dyes, high fructose corn syrup, and no meaningful electrolyte content.
Homemade electrolyte gelatin typically stays fresh in the refrigerator for up to five to seven days when stored in an airtight container. It is important to keep it consistently chilled, as gelatin begins to break down and release liquid at room temperature. For best texture and nutritional quality, consume it within the first three to four days after preparation.
💬 Let's Stay Connected!
For daily recipes, kitchen tips, and exclusive content, follow me on:
👉 Facebook for behind-the-scenes & community fun
👉 Pinterest for visual inspiration & meal ideas
👉 X (Twitter) for quick tips & trending recipes
📲 Join the flavor journey, your next favorite recipe is just a follow away!
Disclaimer: This content is provided for general informational and educational purposes only. It is not intended as medical, nutritional, or professional advice. Always consult a qualified healthcare professional or registered dietitian before making changes to your diet, health routine, or lifestyle. Individual needs and results may vary
Leave a Reply