
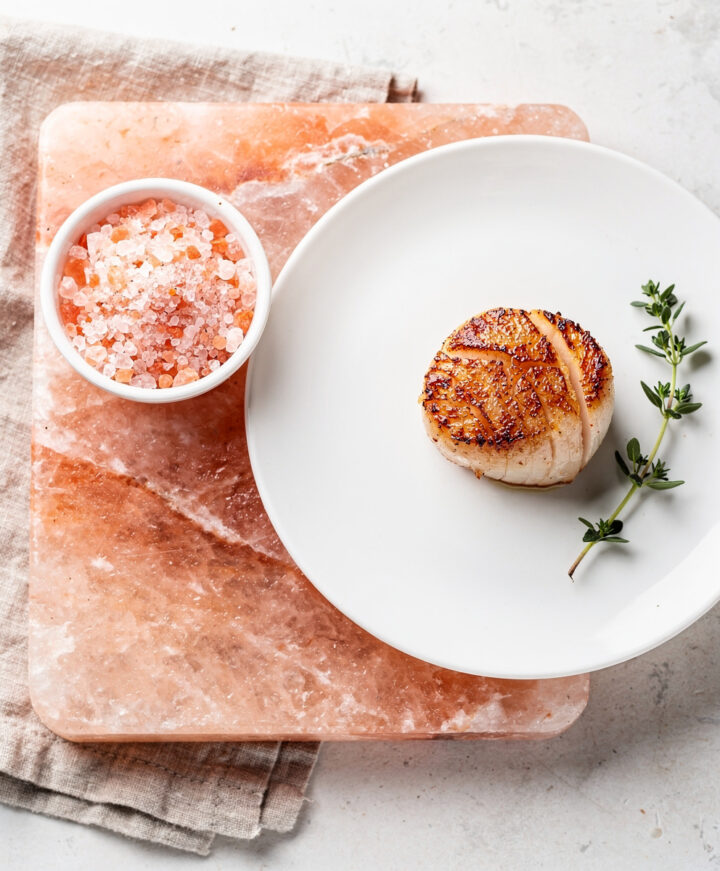
Long before it was a trendy kitchen gadget, salt blocks were used in ancient cultures for preserving and curing food over open fires. That history of slow, intentional cooking is the soul of using one today. This Pink Salt Cooking 101 guide honors that tradition, teaching you how to use this ancient tool for modern, flavor-packed meals.
I still remember the first time I cooked with a Himalayan salt block in my Queens kitchen, the way my grandma would always say, "Listen for the sizzle." It wasn't just to catch your attention, but a signal that magic was happening, flavor was building, texture was changing, and patience paid off. Today, with recipes using pink Himalayan salt growing in popularity, I want to share the best-kept secrets that go beyond the hype and really bring home the joy and ease of cooking with pink salt, both in block and grain form. Pink Salt Cooking-101 isn't just about the tool; it's about understanding why this salt works the way it does, how to treat it, and how to maximize results without a ton of stress or kitchen chaos.
People often ask me: Should I grab the salt block or just stick to pink salt grains? Is there more to it than just flavor? How do you keep the block safe? What foods really work best? This guide will answer all those questions and more while focusing on smart, weight-loss-friendly cooking that lets you enjoy the process, not just the result. So grab that block, or the coarse pink grains, and let's get cooking with real know-how.
Jump to:
- Pink Salt Cooking-101
- Understanding Your Pink Salt: Block vs. Grain
- The Non-Negotiable Safety & Preparation Protocol
- The Master Temperature & Application Guide
- Pro Techniques for Flawless Execution
- Cleaning, Troubleshooting, and Long-Term Care
- Selecting Your Tools: A Buyer's Guide
- Conclusion: Embracing the Craft
- Explore All Culinary Pink Salt Recipes
- FAQs about Pink Salt Cooking-101
Pink Salt Cooking-101
This recipe showcases the perfect use of a Himalayan salt block for a restaurant-quality sear. Dry scallops meet the hot, seasoned block for a caramelized crust, finished with a bright sprinkle of coarse pink salt and fresh herbs. It is a simple yet impressive technique that highlights pure flavor.
- Total Time20min
- Yield2 servings 1x
- DietGluten Free
Ingredients
- 8 large dry sea scallops (about 1 lb)
- 1 tsp high-smoke-point oil (avocado or grapeseed) for block curing
- 1 tsp coarse pink Himalayan salt grains
- 1 small lemon, zested and cut into wedges
- 1 tbsp fresh parsley, finely chopped
- 1 tsp fresh chives, finely chopped
- Freshly ground black pepper to taste
Instructions
- Ensure your Himalayan salt block is properly cured. If new, follow the seasoning protocol: heat slowly, apply thin layers of oil, and cool.
- Place the salt block on a stovetop burner or grill. Heat slowly over 20-30 minutes, starting on low and gradually increasing to medium-high heat. The block is ready when a few drops of water flicked onto the surface sizzle and vanish instantly.
- While the block heats, prepare the scallops. Pat them completely dry with paper towels. This step is crucial for a good sear.
- Once the block is hot, place the dry scallops on it, ensuring they are not crowded. Do not add any oil to the scallops or the block.
- Sear the scallops for about 2 minutes per side, or until a deep golden-brown crust forms and the centers are just opaque.
- Carefully remove the scallops from the block using a thin spatula. Transfer to serving plates.
- Immediately finish the scallops with a light sprinkle of coarse pink salt grains, fresh lemon zest, chopped parsley, chives, and a twist of black pepper. Serve with lemon wedges on the side.
- Let the salt block cool completely before cleaning. Scrape gently, wipe with a barely damp cloth, and dry on low heat.
Notes
The key to success is perfectly dry scallops and a properly preheated salt block. Never rush the heating process to avoid thermal shock. For a complete meal, serve over a bed of sautéed greens or zucchini noodles.
- Prep Time: 15min
- Cook Time: 5min
- Category: Dinner
- Method: Searing
- Cuisine: Modern American
Nutrition
- Serving Size: 2
- Calories: 180
- Sugar: 1
- Sodium: 980
- Fat: 5
- Saturated Fat: 0.5
- Unsaturated Fat: 3.5
- Trans Fat: 0
- Carbohydrates: 6
- Fiber: 1
- Protein: 28
- Cholesterol: 55
Understanding Your Pink Salt: Block vs. Grain
Pinpointing the right pink salt form is the little bit of legwork that makes the biggest difference in your cooking and finishing. Contrary to many recipes for Himalayan pink salt, understanding how the block and the grains function differently is the foundation for trusted results.
The Science of the Salt Block: Heat Retention, Not Mineral Infusion
A pink salt block is a heavy hitter when it comes to heat retention. Its dense, crystalline structure absorbs and holds heat evenly, which makes it perfect for searing and slow cooking. Many people assume the mineral content actually infuses food deeply or significantly enhances nutrition during cooking. Truth be told, that's a bit overblown. While trace minerals are present, the main function of the block is as a heat reservoir offering an even cooking surface that seasons food subtly and consistently.
Think of the block as a hot stone you'd find in a traditional kitchen of old, holding steady heat, transferring moisture slowly, and seasoning with just the right touch of saltiness. When you cook shrimp or scallops on it, you're not soaking them in minerals; you're relying on that even heat and a tiny pink-salt pinch that disciplines flavor without overwhelming.
Pink Salt Grains: A Finisher's Tool
When it comes to finishing, nothing beats pink salt grains. The chunky, irregular crystals provide that satisfying crunch and zip that finer table salts miss. Recipes with pink Himalayan salt often include this step because the coarse grains bring texture plus an immediate burst of salinity that wakes up fresh fruits, vegetables, salads, and even desserts.
The pink color isn't just eye candy either, it reflects the mineral complexity that adds a more nuanced flavor profile compared to pure sodium chloride salts. As a sprinkle on ripe tomatoes or avocado, or even dusted over dark chocolate desserts, this finishing salt adds dimension without the kitchen theatrics or fuss.
The Non-Negotiable Safety & Preparation Protocol
Pink Salt Cooking-101 means taking safety seriously, not just for your dinner, but for your salt block investment and kitchen. Many competitors skip over the crucial prep and safe-use protocols, but these are what keep your block intact and tasting great for years.
The Critical First Cure: Seasoning Your Block
A brand-new salt block looks pretty, but it's porous and thirsty. Without seasoning, food tends to stick or sink into those microscopic pockets, ruining the finish and making cleanup an uphill battle. Here's how to put that new block through its paces:
- Preheat your salt block slowly on the stove or grill for 10-15 minutes at low heat.
- Apply thin layers of a high-smoke-point oil like avocado or grapeseed with a clean cloth or brush.
- Repeat heating and oiling for a few cycles until the surface looks a little glossy and non-porous.
- Let it cool naturally, then store it wrapped in a dry cloth or parchment paper.
This curing seals those micro-pores, creating a semi-non-stick surface, so you get that beautiful sear without salt fragments sticking to your scallops or steak. It's a simple step that pays off with every use.
Heating Without Fear: The Golden Rule to Avoid Thermal Shock
Thermal shock is the enemy of your Himalayan salt block. It happens when the block is heated too quickly, causing tiny fissures, or worse, audible cracking, that weaken and ruin your slab. Most recipes for Himalayan pink salt vaguely say "heat gently," but here's the chef logic you really need:
- Heat your block slowly over about 20-30 minutes, increasing heat incrementally every 5 minutes.
- Whether on the stovetop, oven, or grill, start low, then move up to medium. Avoid blasting it from cold to 400°F in minutes.
- Watch and listen: if you hear popping or see hairline cracks, STOP heating and let the block cool down.
- If you have a new block, don't skip this slow-heating ritual even once.
Thermal shock is caused by the temperature difference between the cold interior and hot exterior, not just how high the heat is. The slow, steady approach prevents dangerous stress and extends the life of your salt block.
The Master Temperature & Application Guide
In Pink Salt Cooking-101, guessing is out. This temperature and application chart is the anchor for consistent, delicious results.
Hot Applications: From Searing to Baking
| Food Item | Target Block Temp (°F) | Key Prep Tip | Approx. Cooking Time |
|---|---|---|---|
| Scallops | 375-400 | Pat completely dry, no oil | 2 minutes per side |
| Thin Sliced Steak | 400 | Room temp, dry, no oil | 2-3 minutes per side |
| Shrimp | 375 | Dry, deveined | 2 minutes per side |
| Pork Chops | 375-400 | Pat dry, season with pink salt | 5-6 minutes total |
| Cheese (Halloumi) | 350-375 | Sliced and patted dry | 3 minutes per side |
| Dark Chocolate (Tempering) | 80-90 (warm, not hot) | Use very dry salt block | N/A - For finishing |
The dryness mandate can't be overstressed. Wet seafood steams, sticks, and takes forever to caramelize. The salt block's surface draws moisture quickly; moisture left on protein causes uneven cooking and flavor loss.
Cold Applications: Chilling and Serving
Your pink salt block doesn't stop at heat. After cleaning, wrap it well and chill it in the freezer to use as a stunning serving platter. This adds a chill that elevates seafood, fruit, sushi, cheese, and more.
The cold salt subtly enhances the real flavors without watering down your plate or overwhelming your palate. Some favorites:
- Sushi and sashimi
- Fresh oysters and clams on the half shell
- Sliced heirloom tomatoes or melon
- Variety of cheeses with crackers
- Berry and citrus platters
Wrap your salt slab tightly in plastic wrap or a sealed bag to keep moisture out while chilling, and bring it out a few minutes before serving so it's cold, not frosty.
Pro Techniques for Flawless Execution
Cooking with a pink salt block is about understanding how to orchestrate heat, moisture, and seasoning with purpose.
The Art of the Sear on Salt
In many pink himalayan salt recipes, cooks instinctively add oil before searing. Don't fall into that trap here. Oil creates a smoke cloud on your salt block and messes with the direct contact needed for a perfect sear.
The salt block's seasoning is enough. Instead, follow this approach:
- Preheat your block until the water droplet test (a few pinches flicked onto the surface) skitter and vanish instantly, a sign the block is ready and hot enough.
- Place dry scallops, steak, or shrimp directly on the block.
- Don't crowd the surface; cook in batches to keep the temperature steady.
- Let the protein develop a deeply caramelized crust before flipping.
The block's heat combined with protein's dry surface creates that caramelized crust, a texture and flavor combo otherwise unattainable in your regular pan.
Finishing with Pink Salt Grains: When and Where
Many Himalayan pink salt recipes miss this crucial phase: using pink salt grains after cooking. Here's the deal:
- Sprinkle coarse pink salt on ripe tomatoes, avocado slices, or pumpkin soup to give a freshness boost.
- Dark chocolate lovers can toss tiny crystals on desserts to contrast sweetness with crunch + zip in every bite.
- Try a pinch on caramel or even rim a cocktail glass for something unexpected but memorable.
Use these grains at the table or after plating to preserve their texture and nuanced crunch, rather than cooking them into the dish.
Cleaning, Troubleshooting, and Long-Term Care
Your salt block is an investment treat it right, and it will serve you well for years.
The Correct Cleaning Method (And Why Dishwashers Are Disastrous)
Salt blocks don't like water soaking. Here's the post-use regimen to keep yours in tip-top shape:
- Let the block cool completely before cleaning.
- Use a plastic scraper to remove stuck food gently.
- Wipe with a barely damp cloth or sponge (avoid soaking!).
- Do NOT use detergent or submerge in water.
- Once clean, place your block back on low heat for a few minutes to evaporate any moisture and prevent cracking.
Dishwashers or harsh soaps dissolve the salt and cause premature damage. The goal is a dry, clean surface that retains seasoning for the next use.
What to Do When Things Go Wrong
My block cracked
Minor cracks don't always mean disaster. If the crack is stable and doesn't worsen when heated slowly, you can keep cooking on the intact sections. Avoid putting stress on fissures, and inspect the block before each use.
My block is stained
Use a gentle scrub of coarse salt and a lemon wedge to brighten the surface. Rinse lightly and dry thoroughly with heat.
Food sticks excessively
Your block likely needs re-curing (see the seasoning section). Don't skip this step, especially if you notice persistent stickiness.
Selecting Your Tools: A Buyer's Guide
Not all pink salt is created equal. Choosing the right block and grains saves money and time.
Choosing a Quality Salt Block: Thickness, Grade, and Source
Aim for a minimum 1.5-inch thickness to hold and distribute heat evenly. Thinner blocks heat unevenly and risk breaking. Look for food-grade Himalayan salt, often labeled as "culinary grade" or "food grade." Source matters too: ethically mined salt blocks from the Khewra mines in Pakistan offer better quality and traceability than cheaper alternatives.
Selecting Pink Salt Grains: Coarse vs. Fine & Grinder Tips
Coarse grains suit finishing dishes or seasoning right before serving. Finer grains dissolve quicker and work well in recipes for Himalayan pink salt where salt needs to blend smoothly in sauces or baking. When choosing grinders, look for ceramic or stainless steel components to avoid corrosion from the salt's hardness and mineral content.
Conclusion: Embracing the Craft
Pink Salt Cooking-101 is more than following a recipe or having the right tool. It's about understanding salt as a dynamic factor in your kitchen, tactile, intentional, and every bit as much about skill as it is flavor.
Whether you're searing scallops directly on a hot block or sprinkling coarse crystals over a blue cheese salad, these techniques help you cook smarter, not stricter. They let you enjoy the small moments, the sizzle, the crunch, the little pink-salt pinches that make big flavor.
Let me know how your salt block searing or pink salt finishing went in the comments! Don't forget to tag @SaltClarity on Pinterest, I love seeing your takes on recipes for Himalayan pink salt and all the delicious ways you bring pink salt beautifully into your kitchen.
For more tasty inspiration, check out these Salt Clarity favorites:
- Himalayan Pink Salt Chicken Recipes for savory, heart-healthy meals
- The zingy Ginger Turmeric Lemon Pink Salt Shot to energize your mornings
- Or try the fun Himalayan Pink Salt and Ice Trick Recipe for a new way to chill your favorite treats.
Enjoy the process, enjoy your salt!
Explore All Culinary Pink Salt Recipes
Every recipe in this culinary collection uses pink Himalayan salt as the key seasoning ingredient:
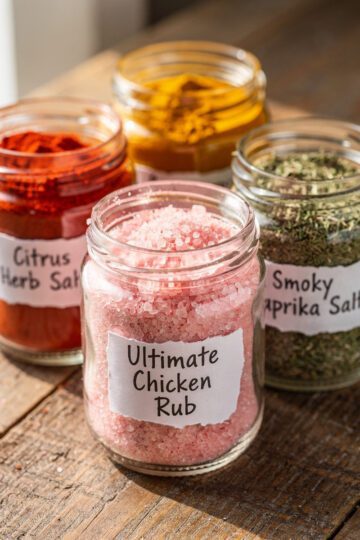
- Technique & Knowledge: Finishing vs Cooking Salt Guide · Pink Himalayan Seasoning Salt Recipes
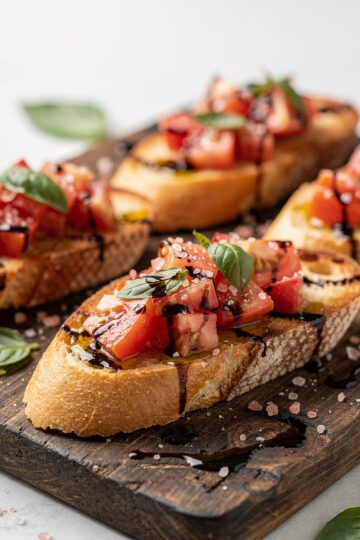
- Proteins & Mains: Pink Salt Chicken Recipes · Pan-Seared Salmon · Pink Salt Smash Burgers · Tomato Basil Bruschetta
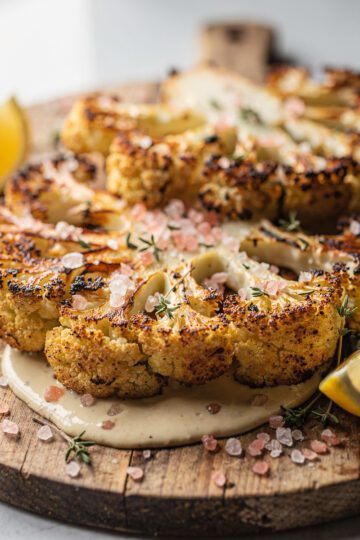
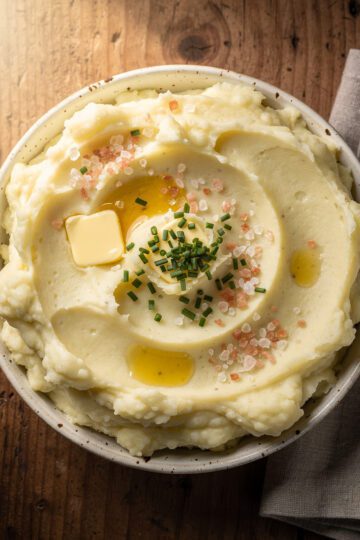
- Vegetables & Sides: Crispy Roasted Vegetables · Roasted Cauliflower Steaks · Creamy Mashed Potatoes
FAQs about Pink Salt Cooking-101
Pink salt contains trace minerals that some believe enhance flavor and offer health benefits. However, the actual difference in taste and nutritional value compared to regular table salt is minimal. It's primarily used for its aesthetic appeal and perceived health benefits, but it functions similarly to other salts in cooking.
Yes, you can generally use pink Himalayan salt for all cooking purposes just as you would use regular table salt or sea salt. It's suitable for seasoning dishes, baking, and even preserving food. Just be mindful of the grain size and adjust the amount accordingly, as coarser grains may deliver a more intense salty flavor.
Some people detect a slightly different taste in pink salt due to its mineral content, often described as more complex or subtly sweet. However, the difference is usually very subtle and may not be noticeable to everyone. The taste is largely dependent on the specific salt's origin and mineral composition.
To cook on a Himalayan salt block, preheat it gradually in the oven or on the grill, starting at a low temperature and increasing incrementally to prevent cracking. Once heated, place food directly on the block to cook; the salt will season the food as it cooks. After use, let the block cool completely before cleaning it gently with a damp cloth; avoid soap.
Pink salt contains trace minerals like potassium, magnesium, and calcium, which are not found in significant amounts in table salt. These minerals can contribute to overall health, but the quantities in pink salt are typically too small to provide substantial health benefits. Therefore, while pink salt may offer a slight nutritional edge, it's not significantly healthier than regular salt and should still be consumed in moderation.
The primary benefits of using pink salt are its potential for a slightly enhanced flavor profile due to trace minerals and its aesthetic appeal. Some believe the trace minerals offer health benefits, but the amount is minimal. It's also a natural product, often less processed than table salt.
💬 Lets Stay Connected!
For daily recipes, kitchen tips, and exclusive content, follow me on:
👉 Facebook for behind the scenes & community fun
👉 Pinterest for visual inspiration & meal ideas
👉 X (Twitter) for quick tips & trending recipes
📲 Join the flavor journey, your next favorite recipe is just a follow away!
Leave a Reply